Adding repositories
This document explains how to add and activate a repository in D1.
Overview of the process of adding a new repository
- Add a new repository.
- (Optional) Review the predefined settings and change them if required.
- Configure repository storage settings.
- Configure repository database settings.
- Synchronize and activate the repository.
The following video shows how to add a new repository in D1:
Note that some of the UI components shown in this video might have changed as the video was created based on a older version of the D1.
Task 1: Add a repository with the default properties
If a system administrator has configured the default properties for D1 repositories in the installation settings file, adding new repositories should be very quick and simple. Otherwise, you will need to configure repository properties manually each time you add a new repository.
Log in to Document.One, and open the D1 Administrator page:
Select Repositories , and then Click New.
Select a type of the repository (D1, CMIS or Documentum) to be added.
Select Storage Type. You can use a database, file system or cloud storage. D1 provides native connection support to both Google Cloud Platform and Amazon Web Services (you will need to provide service details later).
NoteThis option is not available for external CMIS and Documentum repositories, because content storage of external repositories is configured on their end, and not in D1.
Select Cache Storage Type. Specify how cached data should be stored - in a database, file system or cloud storage.
Optionally, select a Policy Operation from the list:
NoteAdding policies to a repository means that they can be used in this repository, and not that they are effective immediately. For more information about policies in D1, go to Configuring policies.
- ADD_DEFAULT (default option) - adds system policies to this repository
Optionally, select a Post Operation from the list:
- none - D1 doesn't perform any action after you add this repository
- synchronize - repository configuration is synchronized after you add it
- synchronizeAndActivate - repository configuration is synchronized and the repository is activated after you add it
Click OK. Your repository is now created with the default properties:

Your repository can now be explored and used (if default properties were configured on your D1 installation and you selected synchronizeAndActivate option).
If you're happy with the default configuration, you can now move on to Synchronizing and activating repositories. If you want to change the default properties, see Edit the predefined properties of the repository first.
Task 2: Edit the predefined properties of the repository
Repository default properties are set based on ADX_DEFAULT runtime properties, which you can set during D1 installation.
Highlight your newly created repository and click Details. Repository editing view opens and the following sections are available:
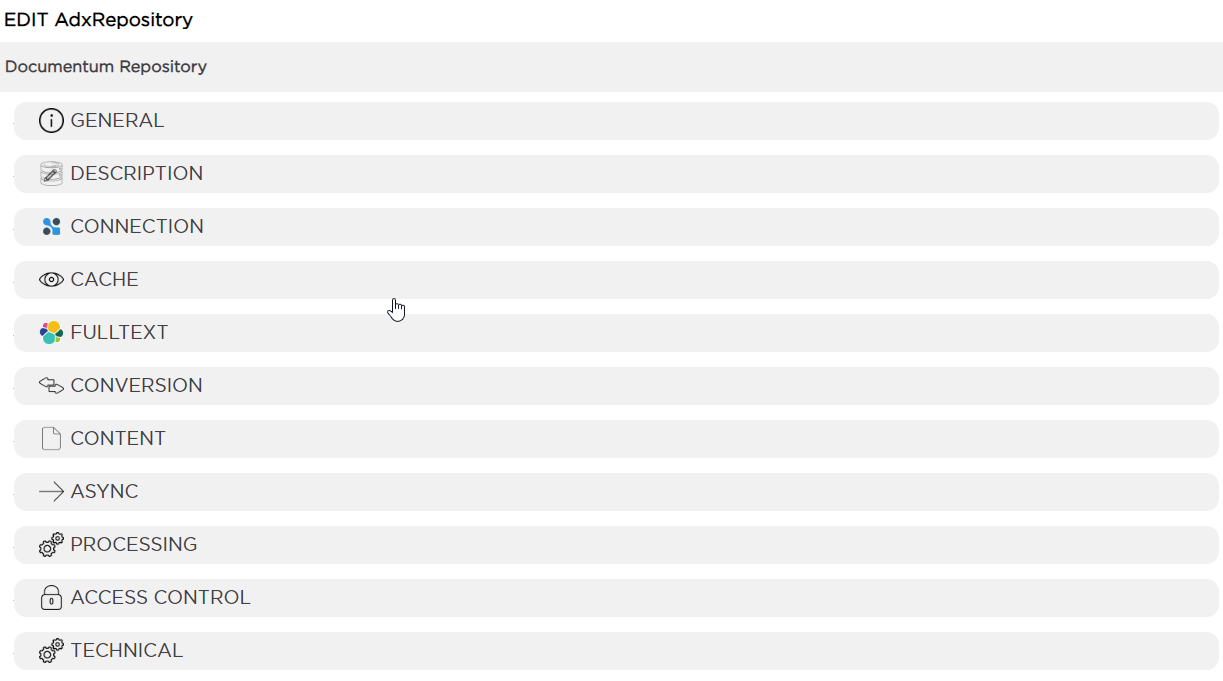
This is a collapsed view. Click on the headings to expand and collapse the properties inside.
Edit the properties as required - see Repository properties reference for information about every property. In general, properties marked in bold must be set.
Click Apply to save your changes and close the window.
Commit your changes.
Synchronize and activate the repository.
Task 3: Configure the repository storage
You can configure the following storage properties:
- Both cache and content storage for D1 standard repository
- Cache storage for external CMIS and Documentum repositories (content storage in this case is configured outside of D1, on the external repository side)
Default values for both cache and content storage can be configured with runtime properties in the installation settings file. See D1 Storage runtime properties for detailed information on available properties. If you have these defaults configured in your D1 installation, you can skip this configuration, unless you want to use different storage than configured by default.
Highlight your newly created repository and click Details. Repository editing view opens.
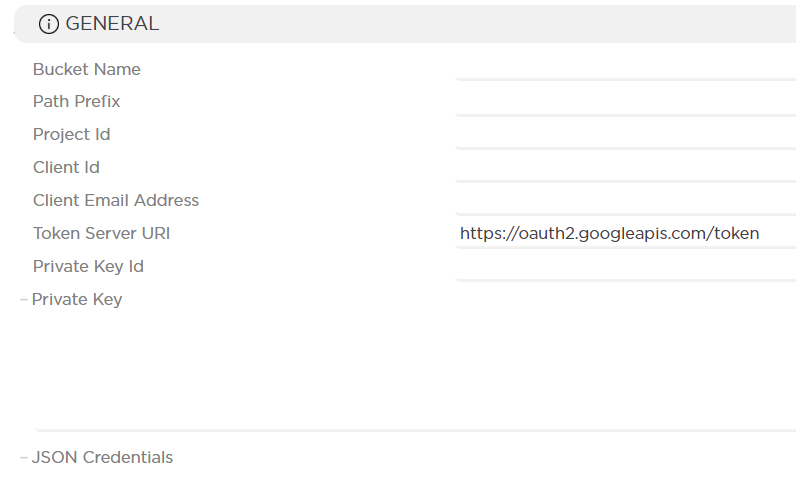
In the editing view, click on Content Storage. Provide the required information (use tooltips to get information on each field):
Google Cloud Platform
Amazon Web Services

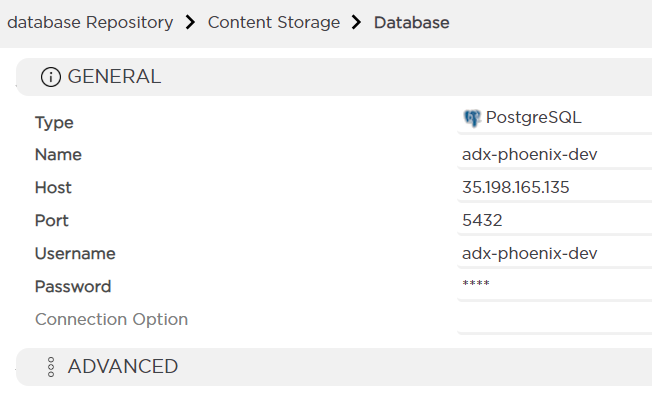
Database
Note: in case of database storage, you need to click on the database name to open the form.
File System
In case of file system storage, simply provide the file system storage directory for repository contents.
Repeat the above process for Cache Storage.
Task 4: Configure the repository database
D1 standard repository requires a content database and cache database. CMIS and Documentum require a cache database at the minimum. Additionally, you can use a database to store resources (both content and cache resources in case of D1 standard repository, cache resources only in case of CMIS/Documentum repository).
Databases should normally be configured with runtime properties during D1 installation. However, if necessary, you can also configure the database from D1 UI:
Highlight your newly created repository and click Details. Repository editing view opens.
Select the database you want to edit:

Provide database information in General section.. Properties marked as bold are mandatory.

If necessary, you can change the default database technical settings in the Advanced section. For detailed information on these settings, see HikariCP Configuration. We recommend that you consult your infrastructure team before changing the advanced settings.
Task 5: Synchronize and activate the repository
Having added a new repository, follow the steps below to activate it and make sure it's working:
Run a connection health check on the repository (click Health in the bottom menu, then Connection Check). The resulting report should be all green.
Select your newly added repository and click Synchronize in the bottom panel. Synchronization brings your configuration into the current runtime and therefore is required before you can use your repository after making changes.
Activate the repository (click Activate in the bottom menu). This action enables the Content Area and brings all endpoints online.
Run a deep health check on the repository (click Health in the bottom menu, then Deep Check). The resulting report should be all green. If the report is OK, you can now start using your repository.
infoFor more information about health checks, see Running Conversion and platform health checks.
Click Explore to open the repository and start using it.
You can add repositories using Repository Administration endpoints exposed via D1 REST API. For more information, see REST API documentation.