Exporting and importing repository contents
This page describes how to export and import repository contents. Content export and import are based on JSON metadata files, created either on upload or after running the bulk export service - depending on your repository settings and preferences.
To export the whole repository, see Exporting and importing repository configuration. You need administrator privileges for this operation (see User management for details).
About metadata files
Metadata files of an entry (content or folder) are stored (by default) under ${TRIBEFIRE_INSTALLATION_ROOT_DIR}/../repository-resources/content/_meta/ENTRY_ID
The file is written in JSON, showing all information available for the entry, including id, name, and resource data:
{"_type": "tribefire.adx.model.content.Content", "_id": "0",
 "active": true,
 "chronicalId": "1a6d2513-3023-4c69-adcd-465345497f5b",
 "createdAt": "2020-02-24T14:14:29.671+0100",
 "createdBy": "cortex",
 "entryType": "CONTENT",
 "id": "2a847174-bff9-483a-a682-182090471663",
 "lastModifiedAt": "2020-02-24T14:14:29.671+0100",
 "lastModifiedBy": "cortex",
 "name": "nothing_selected_message",
 "owner": "cortex",
 "partition": "access.adx.content.default",
 "resource": {"_type": "com.braintribe.model.resource.Resource", "_id": "1",
  "created": "2020-02-24T14:14:29.671+0100",
  "creator": "cortex",
  "fileSize": 87187,
  "id": "703f33dc-1425-44f4-a803-5caa0d2baeef",
  "md5": "45391e46203f2a815971bf7b6cc83459",
  "mimeType": "image/png",
  "name": "nothing_selected_message.png",
  "partition": "access.adx.content.default",
  "resourceSource": {"_type": "com.braintribe.model.resource.source.FileSystemSource", "_id": "2",
   "id": "b5241fc2-caf2-4a6a-9d1c-b43a924a41fd",
   "partition": "access.adx.content.default",
   "path": "2002/2414/1429/01333782-a893-48cd-8ea6-6a9f5bc741f9"
  },
  "specification": {"_type": "com.braintribe.model.resource.specification.RasterImageSpecification", "_id": "3",
   "heightInCm": 0.0,
   "id": 589,
   "pageCount": 1,
   "partition": "access.adx.content.default",
   "pixelHeight": 935,
   "pixelWidth": 1908,
   "widthInCm": 0.0
  }
 },
 "version": "1.0",
 "versionStatus": "CURRENT"
}
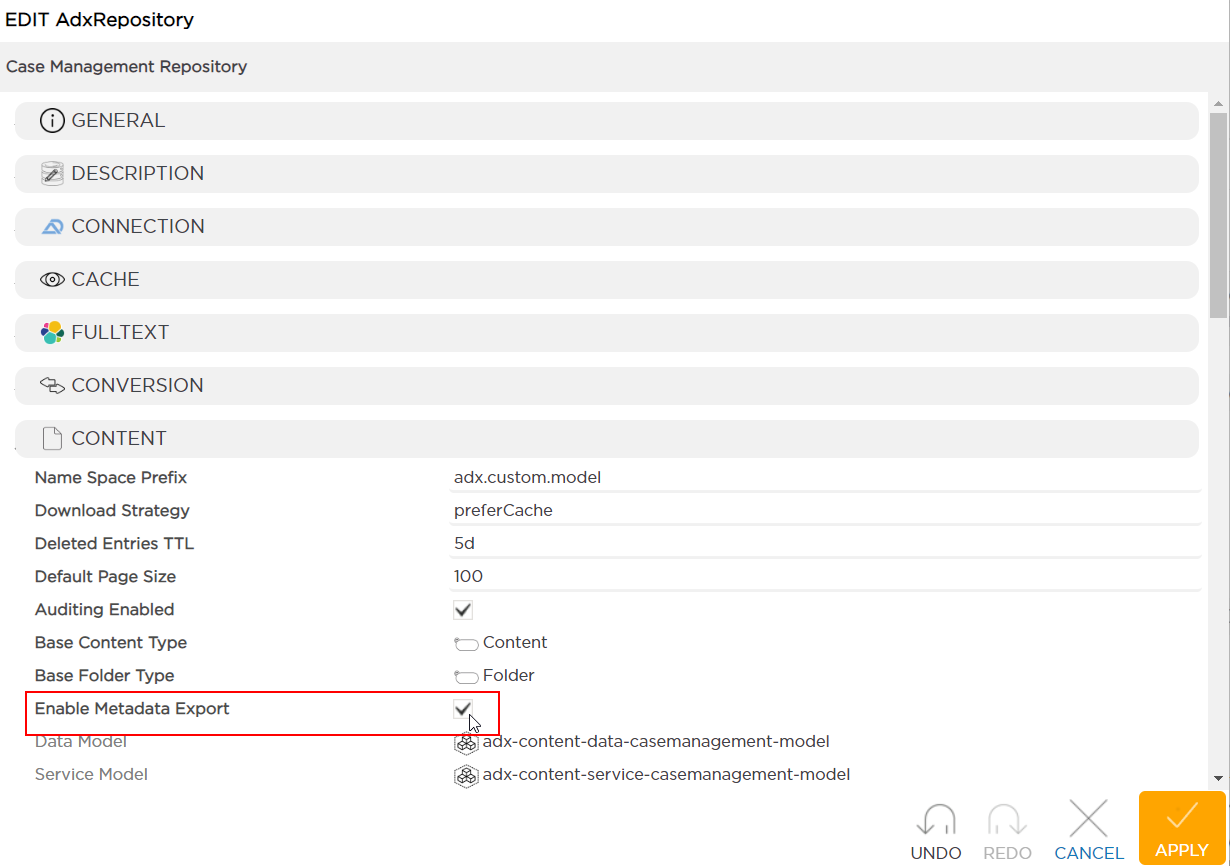
To enable metadata export
After enabling metadata export, newly added repository contents have their metadata written automatically, and the metadata export feature can be used. Default status of this feature is controlled by the ADX_DEFAULT_ENABLE_METADATA_EXPORT runtime property (enabled by default).
Log in to D1, and open the D1 Administrator.
Go to Repositories and enable metadata storage on the target repository:
Synchronize the repository. This is necessary to bring configuration change online. From this point onwards, all newly created and updated entries will have their metadata files written.
From now on, having created or updated an entry, you can find the corresponding metadata
.jsonfiles written in the_metafolder inside the repository content storage directory. Each repository entry is written into its dedicated folder, where you can find the following files:meta-ENTRY_IDas inmeta-b28e39ab-240a-4cd5-9be1-f0416189f931- representing the entrymeta-document-ENTRY_IDas inmeta-document-b28e39ab-240a-4cd5-9be1-f0416189f931- representing a document representation for WebReader, including any attachments
By default, you can find this folder in
${TRIBEFIRE_INSTALLATION_ROOT_DIR}/../repository-resources/content/_meta.
To export and import contents from metadata
D1 provides services for content export and import. To export, you can either enable the writing of metadata before you start using the repository or export the metadata for all repository contents. Metadata export must be enabled on a repository for the bulk export feature to work.
The following video shows how to export all documents from a repository and how to import them to another repository.
Log in to D1, and open the D1 Administrator.
Go to Repositories and enable metadata storage on the target repository:
Synchronize the repository. This is necessary to bring configuration change online. From this point onwards, all newly created and updated entries will have their metadata files written.
Select the repository and click Metadata -> Export Metadata, then confirm when prompted. Export job is created and the job ID is returned. You can use this job ID to check the job status in the Cache Area of this repository.
To delete metadata files
To delete all metadata files for a repository, select the repository and click Metadata -> Delete Metadata, and then confirm when prompted. A delete job is created and the job ID is returned. You can use this job ID to check the job status in the Cache Area of this repository.
This deletes all metadata files stored ${TRIBEFIRE_INSTALLATION_ROOT_DIR}/../repository-resources/content/_meta/
REST API
You can use either the Administration API (batch export and import) or the Repository API (individual file import) to export and import contents. For details, please read the following pages:
- Administration REST API - Export/Import - for batch export and import from folder via Administration API.
- Importing Contents into Repository via REST - for import based on individual metadata files via Repository API.